Printing Family Tree Maker Charts
 |
Designing your
genealogy chart in Family Tree Maker is quick and easy! |
Family Tree Maker is an excellent program
that can easily produce a variety of gorgeous genealogy charts ready for printing. Since
it is the most popular genealogy program in use today, here are some simple design tips
that will help Family Tree Maker users create gorgeous looking charts while keep their printing costs as low as possible.
The techniques shown below for Family Tree Maker 16 and earlier also
apply to the more recent versions of Family Tree Maker 2008 going forward. The only
difference is that the menus for selecting these options of changed
somewhat as we show in the examples.
Including Photos or Graphics
If you'll be including photos or graphics on
your chart, you can optionally resize them prior to including them on your chart. Although
Family Tree Maker allows you to scale the size of the photos you place on your chart, the
program is still saving the original full-size photo. This can make your FTM file very large if you have a large number of photos that have large
file sizes. For example, if you're adding a photo that would normally print as a 5 X
7 or an 8 x 10, and it will only be appearing on your chart as a photo that is 2 inches
tall, so you may want to resize the photo before importing it into FTM. This is not necessary, but it will
dramatically reduce the file size of the photo and keep FTM from getting into the hundreds of megabytes big process.
Family Tree Maker Page Breaks
If you've ever printed a small family tree chart
using 8.5 X 11 inch paper, you already know that you don't want your boxes to be cut in
half at the page breaks. Since we'll be printing your family tree chart on continuous roll
paper, you'll be doing the exact opposite. You'll want to change the settings in Family
Tree Maker to allow the boxes to overlap page breaks that you see on your screen.
In FTM 16 and earlier, this is
accomplished by right clicking anywhere on your chart, and then selecting "tree
format". Make sure the overlap page breaks box is checked as shown in
the first example below. This
will eliminate a lot of wasted white space, reduce the width of your family tree chart,
and keep your printing costs low. You don't need to worry about
finding a setting for continuous roll paper as we handle that on our end.
If you're using a more recent version of Family Tree Maker 2008 and forward, the option for
making this selection is always visible in the chart options panel on the
right side of your screen as shown in the second example below.
Eliminating page breaks in Family
Tree Maker version 16 & earlier

Eliminating page breaks in recent versions of Family Tree Maker 2008 and forward

Family Tree Maker Box Sizes
Another thing that you can do to fine tune the
size of your printed genealogy chart is to adjust the width of the boxes. For
exceptionally long family tree charts, adjusting the box sizes could trim a few feet off the total size and
reduce your cost. If you're using Family Tree Maker version 16 or
earlier, this is accomplished by right clicking anywhere on your chart, and
then selecting "maximum box width". This bring up a second screen
as shown in the first example below. If you have previously selected "word
wrap" under "options" in "items to include in each box", long
lines will simply wrap, creating a taller box, but saving you on the width. You should never
use the FTM feature that allows you to drag individual boxes or branches of your tree.
Although everything may appear the way you want it to look on your monitor, when it comes
time to print, your chart won't print correctly. If you're using a
more recent version of Family Tree Maker 2008 and forward, you can adjust your box sizes by
selecting the third icon from the left which appears right under "chart
options" on the right side of your screen as shown in the second example
below. When you do this, another options box will appear which will
allow you to adjust your box sizes, box outline colors, and chart border.
To save on space, you may also want to un-check the option "all boxes same
size" which is the default setting.
Setting box sizes in Family Tree Maker version 16 & earlier

Setting box sizes in recent versions of Family Tree Maker 2008 and forward

Family Tree Maker Picture Sizes
You will also want to adjust the
size of any photos that you want to appear in any of the boxes. The
default size for photos is much smaller than you will want them to appear on
your chart. We recommend a photo size of around 1.2 inches. If you're
using Family Tree Maker version 16 or earlier, this is accomplished by right
clicking anywhere on your chart, then selecting "maximum box width" and
finally adjusting the picture size in the new box which will will come up as shown
in the first example below. If you're using a more recent version of
Family Tree Maker 2008 and forward, the option for making this selection is always visible in
the chart options panel on the right side of your screen as shown in the
second example below.
Setting picture sizes in Family Tree Maker version 16 & earlier

Setting picture sizes in recent versions of Family Tree Maker 2008 and forward

Family Tree Maker Font Styles and Sizes
Although it won't have a major impact on the
size of your family tree chart, selecting a good font size and style is important.
If you select too small of a font in order to keep your chart small, you run the risk of
it not being easily readable by relatives with less than perfect eyesight. The default
font size in Family Tree Maker for most items is 6 or 7 points which is way too small to
use for printing. While it may look fine on your monitor when you zoom in on an
entry, you'll probably want most of your font selections to be between 8 and 12
points. It's usually a good idea to make the person's name one font size
larger than the rest of the data entries and also selecting bold type.
Unless you're trying to keep your chart a certain size, we normally
recommend 12 point bold for the names and 10 point regular for the
additional birth, marriage and death facts. The fonts named Arial or Tahoma are
the most popular and easily readable fonts from our experience.
Although there are many fancier fonts that can be used, they are often
harder to read by older members of a family. In Family Tree Maker
version 16 and earlier, font selection is
accomplished by right clicking anywhere on your family tree chart, and then selecting
"text font, style and size". A second box will then come up
which will allow you to select the font size and style for each of your
entries as shown in the first example below. If you're using a
more recent version of Family Tree Maker 2008 and forward, you can adjust your font sizes and
styles by
selecting the second icon from the left which appears right under "chart
options" on the right side of your screen as shown in the second example
below. When you do this, another options box will appear which will
allow you to adjust font styles and sizes.
Setting font sizes and styles in Family Tree Maker version 16 & earlier

Setting font sizes and styles in recent versions of Family Tree Maker 2008 and forward

Family Tree Maker Chart Dimensions
As you go about fine tuning the layout of your
family tree chart, you'll always be kept up to date by Family Tree Maker about the size of
your chart. This will allow you to refer to our
pricing page so you can determine what you're printing charges will be.
Depending upon the country you reside in, the measurements will be in either
inches (in the U.S.) or centimeters (in the U.K.). If you're using Family Tree
Maker version 16 or earlier, the measurements of your chart always show up
in the bottom right-hand corner of your screen as you're designing your
chart as shown in the first example below. If you're using a more
recent version of Family Tree Maker 2008 and forward., your chart dimensions will appear above
your chart preview window as shown in the second example below.
Locating your chart dimensions in Family Tree Maker version 16 & earlier

Locating your chart dimensions in recent versions of Family Tree Maker 2008 and forward

Setting Your Date Preferences
FTM allows you to select the date format that
will be used in your printed chart. When you submit your order to us, it is
essential that you let us know the date format that you prefer. Although
all of your other design choices will normally be saved within your FTW or
FTM file which you send us, your date preference will not be saved in your file. There is a space on our
order form for this information. If you are not sending us a physical order form,
and are instead sending us an e-mail with your FTW or FTM file attached, please let us know in
your e-mail the date format to use. In Family Tree Maker version 16 and
earlier, this option is accessed by selecting "file" and then "preferences"
on your menu bar. If you're using a more recent version of Family Tree
Maker 2008 and forward, select "tools" and then "options" on your menu bar to bring up the
box as shown in the second example below. The most common date format used by genealogists is 4 Jul 1776.
Setting your date preferences in Family Tree Maker version 16 & earlier

Setting your date preferences in in recent versions of Family Tree Maker 2008 and forward

We're so sure you'll love our family tree
printing services that we confidently provide a complete money
back guarantee on all family tree chart orders.
Please call us at 630-653-8400 or e-mail us at sales@ancestryprinting.com if you have any
questions about any of our family tree chart printing services. International callers can also Skype us if preferred; however, we ask that you email us to set up a convenient time for a Skype to Skype call. We are located in the central time zone of the U.S. (GMT/UTC-6 and -5 in the summer), and can make arrangements for incoming Skype to Skype calls up to around 10:00 PM local time on most nights. We only accept Skype to Skype calls that have been pre-arranged by email. And, if you haven't already done so please
watch the full video about our services.
 |
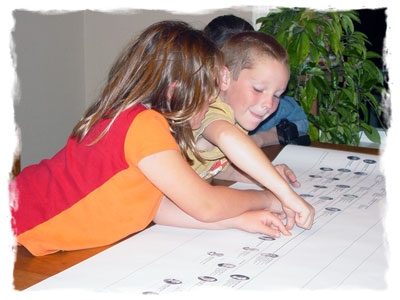
| Adding photos to
your genealogy charts makes them interesting and easy to follow for even the youngest
members of your family. |
Table of Contents
This table of contents is at the bottom of every page on our website.
|


